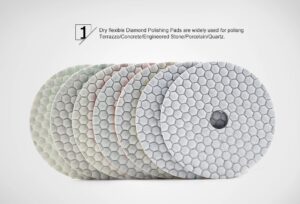
Polishing stone surfaces like granite, marble, or concrete traditionally required a constant stream of water. However, dry diamond polishing pads have revolutionized the fabrication industry. They offer the convenience of working without the mess of slurry while providing a mirror-like finish that rivals wet polishing. But how do you ensure professional results without burning the stone? In this guide, we’ll dive into the best practices for using these tools and how to select the right ones for your project.
Section 1: How to Use Dry Diamond Polishing Pads Correctly
Using dry diamond polishing pads requires a specific technique to prevent overheating and ensure longevity. Follow these essential steps:
-
Safety First: Always wear a high-quality dust mask and eye protection, as dry polishing creates significant silica dust.
-
Choose the Right Speed: Never exceed the recommended RPM. Most dry diamond polishing pads work best between 2,000 and 4,500 RPM. Excessive speed generates friction heat that can melt the resin bond and stain the stone.
-
Start with Coarse Grits: Begin with 50# or 100# grit to remove scratches and level the surface. Move through the sequence (200#, 400#, 800#, 1500#, 3000#) without skipping steps.
-
Keep the Tool Moving: Never hold the polisher in one spot. Constant circular or oscillating motions prevent “hot spots” and ensure an even finish.
-
Cooling Breaks: Even though they are “dry” pads, giving the tool a few seconds of air-cooling between passes will significantly extend the life of the diamond segments.
Section 2: How to Choose High-Quality Dry Diamond Polishing Pads
Not all pads are created equal. When shopping for dry diamond polishing pads, look for these three key indicators of quality:
1. Resin Bond Quality
High-quality pads use a premium, heat-resistant resin bond. Lower-quality pads often use cheap resins that leave “resin marks” (colored stains) on light-colored stones like white marble or quartz.
2. Diamond Concentration
The efficiency of a dry diamond polishing pad depends on its diamond grit concentration. Look for pads that feel heavy and have a dense, visible diamond distribution. Higher concentration means faster cutting and a longer lifespan.
3. Flexibility vs. Rigidity
-
Flexible Pads: Best for curved edges, ogee profiles, and sink cutouts (like our A071A11 Finger Type tools).
-
Rigid Pads: Better for large, flat surfaces to ensure the stone remains perfectly level.
Section 3: Common Mistakes to Avoid
-
Skipping Grits: Skipping from 400# to 1500# will leave microscopic scratches that only appear after the final buffing stage.
-
Applying Too Much Pressure: Let the diamonds do the work. Excessive pressure causes uneven wear and heat buildup.
-
Using Dry Pads for Wet Work: While some pads are “Universal,” using a dedicated dry diamond polishing pad is always better for dry applications as the bond is specifically formulated to dissipate heat without water.
Conclusion: Achieving the Perfect Shine
Mastering dry diamond polishing pads is a must-have skill for any modern fabricator. By selecting high-quality, heat-resistant pads and following proper speed protocols, you can achieve a factory-level finish on any stone surface.
